Showing posts with label Freebie. Show all posts

Friday, December 30, 2011

{Recipes} Classic Snowballs with a Christmas Twist.


"Classic Snowballs" are definitely a favorite in our home. They are a go to recipe for us...a quick sweet treat that requires no baking. I have enjoyed making these treats for many years with my own Mom. They are so versatile and can be used for any occasion or just as a quick no bake everyday treat.

Myself and the kids decided to make these during the holidays. Instead of the classic white coconut, we gave them some Christmas Flair. We turned our snowballs into snowball pops! I have never tried it, but I am betting these would be delish dipped in chocolate! Another time we will have to do just that. If you have a craving for snowballs someday (like I do ALOT. LOL) I have included a super easy shortcut version...if you do not want to take the time to roll.

I have changed the recipe a bit over time, as anyone who has made snowballs will tell you...you have to get the boiling factor just right and the milk...or you could end up with snowballs that will not roll....and will end in failure...too hard or too mushy. :) The classic recipe requires 10 mins of time, but fails to tell you if it is 10 mins from boiling point or from the time it is set to the burner. This is the biggest question I am asked when sharing the recipe. So, I have taken the guess work out of the boiling factor and tweaked the ingredient measurements so they are just right.

Over the holidays we teamed up with Jillian of Catch my Party to create a FREE printable Christmas Collection. We used the party circles from our line for our snowball pops. You can find the entire "Jingle all the way" collection here.


Serendipity Soiree's Snowballs

You will need:

Measures, Medium saucepan, whisk, large spoon or silicone spatula, wax paper, medium Mixing Bowl, Small Bowls (mixing coconut), toothpicks, cookie sticks, food coloring (various colors-optional)


Ingredients:

1.
1/2 cup Butter - Salted (you could also use unsalted...the original recipe calls for hard margarine)
2 cups Granulated Sugar
1/2 cup Milk (we use evaporated tin milk. You could also use 2 percent)

2.
6 tbsp Cocoa Powder (we use fryer's brand...it has to be rich unsweetened cocoa powder)
3 cups Quick Rolled Oats (not instant)
1/2 cup Fine Unsweetened Coconut (you can also use medium)
a pinch of salt
1 tsp vanilla

3.
1 cup of Fine Unsweetened Coconut (for rolling...you can also use medium)


Instructions:

In a Medium mixing bowl, add dry ingredients plus vanilla. Stir well. Set aside


In a small bowl, add coconut for rolling. Set aside. (for colored coconut variation see below)

In a medium saucepan, add butter, sugar and milk. Heat on medium, stirring frequently, until the mixture comes to a boil. Remove saucepan.


Combine the milk mixture into the bowl with the dry ingredients. Stir well. Cool mixture to a warm temperature that you can handle.


Roll into 1 inch balls or 1.5 inch whichever you prefer. We make our snowballs a little larger because I can't resist them. LOL. Roll your Chocolate balls into coconut and place on a wax paper sheet. Cool completely to set the mixture. You can also set on trays and refrigerate to speed up the process. When I just can't wait I take one and place it in the freezer for a few minutes so I can eat one right away....I love snowballs! :)


Variations:

Colored Coconut - Liquid colors work well....we use Wilton gel type colors to get richer colors. Dip a toothpick into your desired color and add to coconut. Add a teaspoon of water to the coconut and combine until your coconut is the desired color you want. We use our hands to combine the colors.


Snowball Pops - To make snowball pops as pictured. Take cookie sticks and place in the rolled snowballs immediately after rolling. When making pops we set on a tray and refrigerate to set the sticks in place.


Snow mounds - When we are feeling lazy and do not want to roll into balls. We make snow mounds. Drop by rounded tablespoon onto waxed paper. Sprinkle with coconut. Shake off excess coconut and place on a tray to cool completely. Again Refrigerating speeds up the process.


The quick version - Snow Mounds


ENJOY!

Monday, November 7, 2011

{Freebie} Thanksgiving Day Flags DIY printable

We are so very thankful to all of our readers at our little blog, facebook, twitter etc. Thank you so much for following along! Here is a little freebie for your Thanksgiving day celebrations..."Give thanks" DIY printable Flags. These little cuties can be used as food picks, drink flags, cupcake toppers etc. We hope you all have an amazing Thanksgiving with you loved ones. Thank you from Serendipity Soiree. xxx Catherine

click image for larger

To Download the High Resolution file, Click here!
When the image appears in your browser (it's a large file), hit right click and "save as". Print and cut!

Matching invites are available in our shop. :)

Thursday, October 6, 2011

{Freebie} You are cordially invited to download our "Vintage Witches brew" Collection!

Double Double toil and trouble! Alot has been brewing here at Serendipity Soiree this past month. One of "witch" We are finally debuting! You are cordially invited to download our "Vintage Witches Brew" Collection  for your vintage inspired Halloween Soiree! The best part is... it's free! The Collection includes a vintage inspired Bewitching Invitation, Matching Party Circles/Cupcake Toppers and Bottle Labels. The Bottle Labels fit perfectly on soda bottles such as Jone's and Stewarts etc and they can also be used on jars for a candy buffet, wine bottles, bag tags, stickers...options are endless for labels and party circles! Just scroll to the bottom of this post for each high resolution pdf. download link. Simply wicked!


"You are cordially invited to a Bewitching Soiree - Invitation"
- click image for larger view -

"witches brew bottle labels"
- click image for larger view -

"Claw of Raven bottle labels"
- click image for larger view -

"Party Circles/Cupcake toppers"
- click image for larger view -

1. Vintage "Witches Brew" Invitation - Click to download .pdf
2. Vintage "Witches Brew" Labels (Witches Brew) - Click to download .pdf
3. Vintage "Witches Bew" Labels (Raven Claw) - Click download .pdf


Monday, September 12, 2011

{Freebie} "Witches Brew" Vintage tea stained party circles/toppers

Having a vintage inspired party this Halloween? We are giving away our "Vintage Witches brew" Collection as a freebie! - a whimsical vintage tea stained design with Witches, black cats and Ravens :) The first giveaway in the series...party circles/toppers...Click below for the download...Matching invitation coming soon! These would also be fun for a Harry Potter party - leaky cauldron anyone? For oodles of Harry Potter inspiration check out our HP party - A trip to Hogwarts school of witchcraft and wizardry and featured customer parties including a Magical Harry Potter Party by the amazing "Kiss me Kate" and another fantastic HP party by Sue R. For our HP collection visit our shop.

Click image for larger view!


Monday, June 13, 2011

{Freebie} DIY Father's day ideas + Printables round up!

With father's day just around the corner, we thought we would share some wonderful  printables, ideas, diy and freebies! Hope you enjoy the roundup!

1. Number one on our list is the ever so talented TomKat Studios. We are loving these adorable little Father's day cards. Your only worry will be which one to choose!


2. Tie-riffic Father's day printables from Shindig parties to go. The set includes a cute tie-shaped "Happy Father's Day" banner, some great tie-shaped centerpiece signs, and cupcake topper sized ties, too. These are just to much! Adorable.


3. Check out these fun Father's day printables from Love Party Printables. This collection has everything you could ever want at your Father’s Day celebration:  party tags, invitations, flags, tented cards, large tented cards, large labels, water bottle labels, napkin rings, favor tags, and the cutest “Happy Father’s Day” banner. Click here to download.


4. How about some fun retro personalized pistachios -- or pickles or hot sauce? Turn any of Dad's favorites into a custom gift for Father's day! Click here for download. Martha Stewart.


5. Father's day HO HO's + Recipe and Printables! Click here for tutorial and download @ Living Locurto


6. How about a breakfast in bed for the favorite Men in our life! Also from Living Locurto. Free party circles, flags and free notecards. Click here for download.


7. Not a freebie...but inspiration for a neck tie/ bow tie inspired party or luncheon.

Mix it up just a little bit by passing out chocolate mustaches as favors. They make for a fun photo-op, too! -- Bliss Bloom Blog

This brand new die-cut invitation by Stevie Streck is perfectly "suited" for the occasion -- available at FineStationery.com

This shirt and necktie cake could serve as the centerpiece for your luncheon. Be sure to use Dad's favorite flavors for the filling and icing! -- Tiepedia

Embellish sandwiches of any kind with small pennant flags in stripes, checks or polka dots -- Joyful Weddings and Events

Dress up simple floral containers with ribbon tied to look like a bow-tie -- Joyful Weddings and Events

Wrap presents with a fancy bow-tie for fun -- Martha Stewart

If you insist on buying Dad a brand new tie, make it a monogrammed tie to be personal -- Martha Stewart

~fine stationary


8.  For those at a loss for words we have some of our favorite quotes about Dad's. Use them to personalize cards, photobooks or scrapbooking pages.

Any man can be a father. It takes someone special to be a dad.

Fatherhood is pretending the present you love most is soap-on-a-rope.  ~Bill Cosby

I don't care how poor a man is; if he has family, he's rich.  ~M*A*S*H, Colonel Potter

"My father didn't tell me how to live; he lived, and let me watch him do it." -- Clarence Budington Kelland


Wednesday, May 25, 2011

{Freebie} Harry Potter Butterbeer labels + Recipe

We have had many requests on how to purchase our graphics from our recent Harry Potter Party beyond our etsy invites. We have decided to share the butterbeer labels and the recipe to make your very own butterbeer. We have included 2 recipe's. One is an easy version we created and the one many children preferred. The other is the long version...but is similar to that of the one @ the wizarding world.  Enjoy!

Click the image for Larger! Print, cut, and affix to soda bottle with low temp glu gun. Make sure to remove orginal soda labels. Jones brand remove very easily!

Recipe ButterBeer (Easy - by Serendipity Creative):
Makes 1
Ingredients:
1 bottle of cream soda (We like Jones)
1/2 cup butterscotch syrup (We like Smucker's squeezable)
1/2 tablespoon butter

Directions:

1. Measure butterscotch and butter into a microwave safe container.
2. Microwave on high for 60-90 seconds, or until syrup is bubbly and butter is completely melted
3. Stir and cool for 30 seconds
4. Slowly mix in cream soda from bottle. Mixture will fizz quite a bit. Slowly stir to combine.
5. Pour mixture back into bottle
6. Chill for an hour in fridge or serve warm
if desired squirt whipped cream into each bottle...the kids at the party enjoyed this! It got a little silly. We used coolwhip spray brand.
*This version is pleasant...and unlike the recipe below you could drink the whole portion. :)

Recipe ButterBeer (copycat wizarding world):
Servings: 4
1 cup light or dark brown sugar
2 tablespoons water
6 tablespoon butter
1/2 teaspoon salt
1/2 teaspoon cider vinegar
3/4 cup heavy cream, divided
1/2 teaspoon rum extract
Four 12-ounce bottles cream soda

In a small saucepan over medium, combine the brown sugar and water. Bring to a gentle boil and cook, stirring often, until the mixture reads 240 F on a candy thermometer.
Stir in the butter, salt, vinegar and 1/4 heavy cream. Set aside to cool to room temperature.
Once the mixture has cooled, stir in the rum extract.
In a medium bowl, combine 2 tablespoons of the brown sugar mixture and the remaining 1/2 cup of heavy cream. Use an electric mixer to beat until just thickened, but not completely whipped, about 2 to 3 minutes.
To serve, divide the brown sugar mixture between 4 tall glasses (about 1/4 cup for each glass). Add 1/4 cup of cream soda to each glass, then stir to combine. Fill each glass nearly to the top with additional cream soda, then spoon the whipped topping over each.

*Note this is a rich drink and you will likely only need a small amount.*


adapted from foxnews


Sunday, April 3, 2011

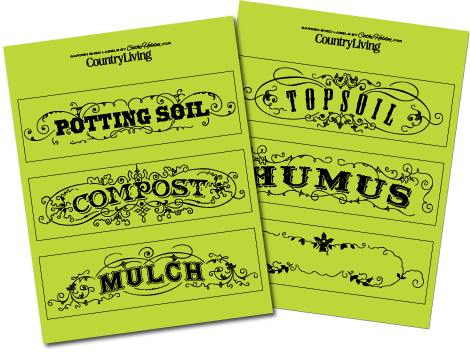
{FREEBIE} Garden Shed/Potting Bench Bin Labels

Get organized with these lovely labels for your garden shed/potting bench. Print on colored cardstock and cut. Adorn your favorite bins.


Country living.

Bins - Ikea 24.99 each

{FREEBIE} HOP (The Movie) Cupcake toppers!

HOP Cupcake toppers...Just in time for Easter! We personally went out and saw the Movie Hop yesterday evening...and it was an amazing family movie. Worth a watch. Our immediate impression was wow Willy Wonka meets the Easter bunny.  Your children will love this movie. It inspired us to create these cute little cupcake toppers. We are giving them away as a Freebie today. Please credit Serendipity creative. Thank you. Hope you Enjoy them!


**Click here for pdf download**

Saturday, March 26, 2011

{Freebie} Easter + Cupcake topper + Printable

 Easter is coming....check out these cute DIY Easter Cupcake Toppers for your dessert table. Big shout out to Black Leaf studios for sharing it with us all.


The files contain 4 printable circles of 2 inches - cut them out with your favourite die cutting tool to your desired shape.
Formats: 300 dpi JPG and PDF
Size: The four circles fit onto a 8.5 x 11 sheet - print as many as you would need.

License Information:
Non-Profit: This is for all personal or non profit use.

{Freebie} Adorable + Easter Set + Printable

With Easter in the air...thought I would share with you this adorable Easter set with tags and embellishments. Great for a sweet easter party brunch or dessert table. Thanks to LaLaStudio for sharing.


- This collection includes:
- Rabbit and flowers cutting file - editable SVG file.
- Single Digital Stamp - at PNG at 300 dpi.
- 6 Tags, embellishments, circles to use digitally or print and cut or punch- PNG and JPG at 300dpi. 
✿How to use the SVG file?
SVG files can be opened with Adobe Illustrator, Inkscape software.Design templates are editbale and resizable.
To use the SVG file as cutting file, Sure Cuts A Lot (SCAL) software are required. SVG file can be used with Cricut, Cricut Create and Cricut Expression cutting machines. SVG file can be saved as dxf then used with craft robo, Xyron wishblade and Quickutz silhouette cutting machinescraft robo, Xyron wishblade and Quickutz silhouette cutting machines.

✿How to use JPG-PNG files?
JPG files can be opened with any photo editing software and Microsoft word. Printer is required.
 

✿Non-Profit : This product can be used only for Personal and NON PROFIT USE.

Saturday, March 19, 2011

{ Spa Party } Inspiration Board + DIY Freebies!

Inspiration board ideas for a fun Spa Party. I am currently working on a Spa Party collection....exciting.

Inspiration Board


Spa Party dessert table in the form of beauty products how fun is that?! If you would like the download for the DIY paper printables (personal use)...they are featured at Nonperiel Mag....design collaboration Kristen Magee.

too cute cupcakes.

Perfect Spa cake...I love this technique...much easier than it looks.


too cute cookies!

Stay tuned for my Spa Party Collection...


Thursday, March 17, 2011

{ DIY } Vintage Can Pretties

As you may know, I have a thing for all things vintage...and these vintage labels and can pretties are no exception. These would be super alongside a vintage or Parisian theme dessert table or vintage theme party...filled with pretty posies. Read on for Inspiration and the Download Freebie for personal use!


DIY Labels - Download Freebie

Inspiration Tins.


Party Inspiration

Vintage Wedding Inspiration


{Instructables}
Gather together
metal food cans ~ empty + washed
decorative paper (wall paper, graph paper, pages from a favorite magazine, vintage food labels) 
glue stick
scissors

Cut labels or other paper to the same height as your can.

If the label does not go all the way around, no worries, cut another piece of coordinating paper to fill in the space.

Glue your label to the can.
Your project is complete.

More can Love:
- Make great pew markers for a vintage wedding.
- Look beautiful grouped together on top of kitchen cabinets/buffet and hutch
- Great for organizing your pens/scissors etc in craft room or home office.
- These would make fun hanging votives for a party or event as well...punch holes randomly for votice light to escape through...punch a hole on top of each side of can and use vintage chain link or ribbon to tie a handle. Look beautiful hanging from balconies/trees for outdoor events or lining a walk or drive.


Related Posts Plugin for WordPress, Blogger...